Showing posts with label Half Square Triangles. Show all posts

Thursday, March 10, 2016

Friends Around the Square

Hi Everyone!

My name is Julie and I am sew excited to present today's featured block for The Splendid Sampler. I own Patched Works in Elm Grove, Wisconsin.


This is a photo of me and Pat from Fall Market.

At Patched Works, we focus on quilting fundamentals to help make quilting a more enjoyable, rewarding experience. I chose a simple pieced block as my contribution to offer a basic skill building exercise.

My block is called "Friends Around the Square"


About 15 years ago, I was at a quilt retreat working on a quilt with a lot of half square triangles (HST). I was painstakingly template cutting each triangle, pairing it with another and stitching on the bias edge to creating each little block. My blocks were beautiful, they just were taking a little bit of time. My table mate looked over and exclaimed "What are you doing?" She showed me her Quick Quarter ruler and the rest is history. We all start somewhere and even though I had been sewing and quilting since I was a young girl and I now own a quilt shop, I find that I learn new things almost every day.

Throughout this journey and your entire quilting career, you will find there are MANY ways to achieve the same result. I always recommend to students to learn as many methods as possible so that you have many tricks in your toolbox. As you learn more techniques you can choose one method over another, you can say, "I know how to do it that way, I am simply choosing to do it another way."

I know how to template cut triangles and sew pairs together into HST, however today I choose a different way. :-) 

Now let's get started!

Cut your fabric according to the directions provided in the pattern.


Cut 2 large squares in half once diagonally for the frame of the block. 


Next, pair up light and dark squares right sides together and position a Quick Quarter ruler from point to point. 


See how the tip aligns perfectly in the corner?


Using a Sewline Ceramic Lead Pencil, carefully draw a line on either side of the ruler. Use caution to position the lead as closely to the ruler as possible to draw an accurate sewing line. 


Stitch on the drawn lines. 

Split each square to yield 2 HST. 


Press open. (You can press to the dark side if you prefer.) 

Trim all 4 HST to 2 5/8" squares. Don't be afraid of the 2 5/8" measurement. 


Position your 4 HST as shown in the picture and assemble as a 4 patch. 


Your center block should measure 4 3/4" 

Position the 4 cut triangles around the perimeter of the center block. 


Align one triangle to the center seam of the square and pin carefully. 


***Note the ample overhang on both edges. It is supposed to be this way!!! 


Stitch 1/4" seam

Repeat on all 4 sides. 

Viola! Look at your beautiful block! 


Pat and Jane included a bonus paper pieced version if you prefer. 

I created a little video for you too! :-) 


I can't wait to see what you make!

Thank you for reading! I hope you visit again soon!

Julie


Wednesday, October 22, 2014

MODA Modern Building Blocks - Week 4 - Triangle Paper Cheats!

Now that I got your attention! :-) 

So I am on my way to Quilt Market - but I couldn't forget about our blocks! 

In class, we talked about how the center of Block #1, Block #12 and Block #18 are all 12" finished blocks and are really a variation on a theme. 

We have focused a lot on the precision method of piecing. TODAY we are going to talk about Half Square Triangle Paper cheats. 

My favorite Triangle Paper is produced by Quiltime. (Of course we carry them at the shop!)


If you have never used Triangle Paper. It is thin paper with pre-printed stitch and cut lines for specific finished sizes of half (or quarter) square triangles. It it easier to use the paper if you are making a bunch of half square triangles with the same fabric combination than it is to draw lines with the handy dandy Quick Quarter on individual squares. 

For a quick tutorial on the basics - a special thank you to Quiltime for this great tutorial with illustrations: 

STEP 1 - Layer and Pin (or Spray Baste with 505)
First cut pieces of fabric to cover the area of the Triangle Paper triangles you wish to use (see below regarding cutting paper to size). Place fabric right sides together and place paper on top. Pin or Spray Baste to hold in place.


STEP 2 - Sew on Dashed Lines
Now, sew the paper and fabric together along all dashed lines to make the seams between the fabric triangles in each square.

I reduce my stitch length when I am sewing on Triangle Paper.


STEP 3 - Cut on Solid Lines
Now, cut the paper and fabric apart along all solid lines to get squares. For quarter square paper, cut on vertical lines, then the lower left to upper right diagonal lines.


STEP 4 - Tear Paper Away
Fold the paper back over the seam to perforate the paper, and tear gently up or out from the seam.

I often refer to the triangles with paper attached as "fortune cookies".


STEP 5 - Press and Trim
I added this step. After you have removed all of the papers, carefully press the squares open. Trim off tails to reduce bulk. 

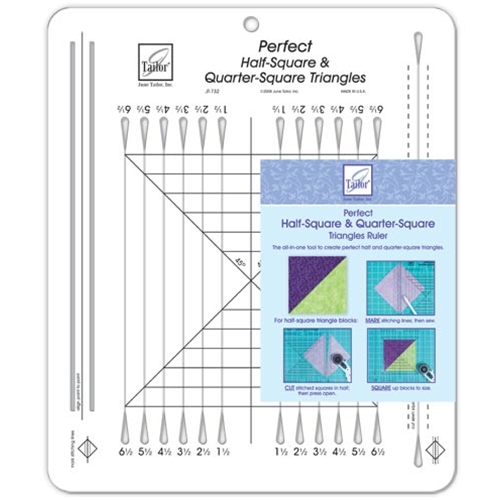
We find Triangle Paper to be incredibly accurate. If you picked the wrong size paper and need to square up or you simply just need a little help. We like the June Tailor - Perfect Half and Quarter Square ruler to help squaring up. 


A Tip to Conserve Unused Triangle Paper
Cut the paper apart along solid lines (vertical solid lines for the quarter square paper) to get the number of triangle squares needed for a given pair of fabrics for your project. Cut your fabric pieces to fit the remaining area with a little extra on the edges for insurance.


Okay, now that you know a little bit about triangle paper, let's talk about why this is important for these blocks. 

If you look at these three blocks, they can all be pieced with half square triangles instead of flying geese and half square triangles. 

You will need 3 sheets of 3" finished half square triangle paper. (or 1 sheet per block) 

A Quiltime 3" finished sheet will yield 16 squares. 


For Block #1, you would arrange like this:


For Block #12, you would arrange like this: 


For Block #18, you would arrange like this: 


Precision Piecing Tip: 

Now for those of you that do not wish to add all of this bulk to your blocks. If you make all three blocks with the same fabrics you can still use ONE sheet of triangle paper to make quick work of your squares! 

Now to finish getting ready for my Quilt Market trip! Stay tuned this weekend for really fun updates from Houston!