Saturday, October 6, 2012

Adding lights to a quilt - free tutorial

Hi everyone...it's Kat from  Calico Cali Designs. Today I'm writing about adding lights to your quilt. Yes you read that right...lights, as in small holiday type lights. I think lights are a great, unexpected addition to any quilted wall hanging. They add a whole other layer of dimension AND they don't have to be just for the Christmas season. Did I mention it's also very easy to do? Read below for all of the details. Happy Quilting!
adding lights to a quilt tutorial
Quilted wall hanging with lights

The first step in adding lights to a quilt is to sew eyelets onto the quilt where you want the lights to go. Count how many bulbs are in your strand of lights, and that's how many eyelets you will need to stitch. On my machine I have can vary the size of the eyelet stitch, and I found that a 7mm eyelet is just perfect. For my witch hat wall hanging, I used an embroidery design that had eyelets as part of the design. I wasn't able to control the placement of the eyelets, but I couldn't resist the fun hat!

adding lights to a quilt tutorial
7mm eyelet holes

Sew the eyelets onto your quilt top, then make your quilt sandwich, quilt it, (add a hanging sleeve), bind it and then you are ready to cut out the holes for the lights.

To cut the holes you will need a grommet/eyelet hole punch kit. (Mine came as part of a button hole kit).  The kit comes with the punch tool and a small mat.
adding lights to a quilt tutorial
Eyelet hole punch kit
 Place the mat underneath the quilt, directly under the eyelet hole that is to be cut. Line up your punch tool on the top of the quilt, and tap it with a hammer.
adding lights to a quilt tutorial
Cutting the holes
 Remember you are cutting through 2 layers of fabric and a layer of batting so you will need to tap with a little bit of force. Not as much as if you were hammering in a nail, but a gentle tap just won't cut through all of the layers.
adding lights to a quilt tutorial
Eyelets with holes cut out
As you cutting out the holes, use a pin to clear away the debris from inside the tool. If it gets too clogged up, it will not cut through all of the layers.
adding lights to a quilt tutorial
Clean the tool
Once you have all of the holes cut, add fray check to the back of the quilt around the holes. Once the fray check has dried, it's time to add the lights.
adding lights to a quilt tutorial
Be sure to use fray check on the back
 I used Flora-Lites. They are battery operated "ornamental" lights. There are 10 bulbs to strand. Even though the package says 'clear' lights, they do have more of a yellow tint to them.
adding lights to a quilt tutorial
Lights that I used

adding lights to a quilt tutorial
Open package of lights

Untangle and lay your lights out on the back of the quilt with the control box at the bottom of the area where the lights are to be placed.
adding lights to a quilt tutorial
Untangle the lights


Push the bulbs through each hole. You will need to use a little bit of pressure to get the lights to slide through the holes. But remember fabric stretches so they will fit.
adding lights to a quilt tutorial
Push lights through the holes 
adding lights to a quilt tutorial
Back of quilt.
Once all the lights are in..the back will look like this. Next step is to flip the quilt over to the top side and push the fabric down around each light.
adding lights to a quilt tutorial
Push fabric down around lights
Next, add the small black rubber O-rings. Push one O-ring down around each bulb. The O-rings ensure that the bulbs stay in place. However they are easy to remove if you wanted to take the lights out of the quilt for washing.
adding lights to a quilt tutorial
O-rings


This is what the bulbs look like once the O-rings are on.
adding lights to a quilt tutorial
O-rings in place
 Now that the lights are in place there's just one more step, securing the control box to the back of the quilt. The control box on this set of lights came with a velcro strip glued to it. The other side of the velcro is sticky. Remove the paper backing and adhere it to the quilt.
adding lights to a quilt tutorial
Control box with sticky velcro

 Tip:  I have found that the sticky velcro doesn't stick to the quilt very well, and over time the box just hangs there. It's not heavy enough to tug on the lights and remove them, but if your wall hanging is going to be on a door (that opens and closes a lot) then I would suggest using some carefully placed hand stitches to secure that velcro in place.

And now the moment you've been waiting for!! Turn the lights on, hang your quilt and enjoy!!
adding lights to a quilt tutorial
Finished quilt


Tuesday, March 6, 2012

Find Your Pin-spiration


Hi everyone! I'm Kat from Calico Cali Designs, and I'm sew excited to be blogging here with Patched Works!

Have you ever wondered what inspires your favorite fabric designer? How do they come up with such great color combinations, striking patterns and motifs? Thanks to Pinterest, now you can find out exactly what inspires them.
 

What is Pinterest? I'm glad you asked! Pinterest is an online cork board. You "pin" photos to it that inspire you. Think of it as a virtual design wall, but instead of pinning up individual quilt blocks you pin photos. Each photo links back to the website where it came from...so it's a great way to keep track of multiple tutorials, recipes you want to try and anything else you don't want to lose track of.

Pins are organized onto category boards, and when you pin a photo, you decide which of your boards to pin it to. To see what inspires others, you follow people and the boards they create. You can choose to follow every board that they have created or just certain ones. When you first log on to Pinterest you will see the pins from the people/boards that you follow. You can also search for items that you are interested in. 

In order to join you have to be invited to create an account. You can browse the site without an account but you will not be able to create any boards or pin any photos until you have an account. Click here to request an invite to join.

When you first join I recommend installing the 'Pin It' button to your internet browser's tool bar, which makes pinning extremely easy and automatically links pins back to their originating website. Click here for more info on how to install the 'Pin It' button.

For more details on how Pinterest works you can read their "Help" section. It has clear instructions on how to join, pin photos, follow people and more.   

As for those fabric designers I mentioned earlier, below is a list of just some of the amazing fabric designers and companies that you can follow on Pinterest.  Be prepared to be inspired by all of the goodies you will see!

(click on the designers name to open up and view their Pinterest boards)

* Kate Spain - fabric designer with Moda 
* Yummy Goods (Melissa Averinos) -  fabric designer with Andover Fabrics
* Pat Sloan - fabric designer with P&B Textiles. Starting in 2012 her fabric will be with Moda
* Betz White - fabric designer with Robert Kaufman Fabrics
* Bunny Hill Designs - fabric designer with Moda
* Moda Fabrics
* Happy Zombie  (Monica Solorio-Snow ) - fabric designer with Lecien 
* Bari J - fabric designer with Art Gallery Fabrics 
* Heather Ross - fabric designer with Seven Islands Fabrics

Happy Pinning!!!
- Kat

Wednesday, February 22, 2012

Back to the Basics - Cutting the Patched Works Way

We have declared 2012 as the year of "Back to Basics" at Patched Works. 

Mastering quilting FUNdamentals will bring the "FUN" back into precision piecing!
We get seduced by intricate patterns, new trends or bad habits and sometimes forget the quilting fundamentals. Those fundamentals help us tackle quilt blocks with ease and finish projects more quickly.
The quilting trend in recent years focuses on big clunky squares and rectangles showcasing large pieces of fabric. The great thing about piecing big clunky shapes is quilts go together fairly quickly with very little muss or fuss. The bad thing about piecing big clunky shapes is that smaller pieces can seem overwhelming and frustrating.

Our goal is to make quilting more fun!

The first quilting FUNdamental is basic cutting.

We will teach basic cutting showcasing our exclusive line of acrylic rulers. Of course any good set of acrylic can be used to achieve quality results.

Cutting the Patched Works Way

Patched Works founder Trudie Hughes invented a series of 4 rulers that we continue to manufacture and distribute today as the gold standard of acrylic cutting tools.

The rulers have clean lines, a reduced number of markings to allow for clearer sight of the fabric, and great features that do not exist on other rulers.

Standard Ruler Features:

·         Numbers are centered and read one direction. Easily spot the measurement required.
·         Markings every ¼” and dotted lines at essential 1/8” markings.
·         Intersection of 45° lines ¼” from the edge of the ruler ensures points won’t be lost in seams.
·         Less frequent 90˚ line markings provide improved view of fabric.

Rotary Rule(The Original)
3 ½” x 24”
·         A pioneer in the rotary cutting revolution.
·         Thin design to minimize slide along fabric while cutting.
·         45˚, 60˚ and 90˚ lines


Rotary Mate™ (The Baby)
3 ½” x 12”
·         Extends Rotary Rule™ into a 7" ruler.
·         Perfect size for cutting small pieces.
·         "Speedies" mark a quick cut used in many Trudie Hughes patterns for snowballs and other shapes.
·         45˚and 90˚ lines


Big Mama™ (The Favorite)
6 ½” x 12”

·         Extends the Rotary Rule™ or Rotary Mate™ into a 10” ruler. 
·         Use for most sub-cuts.
·         45˚and 90˚ lines
·         Combine rulers using numbers along the long edge.


Big Daddy™ (The Strip Cutter)
6 ½” x 24”
·         Perfect for large pieces.
·         Heavy weight makes clean up cuts a breeze.
·         45˚, 60˚ and 90˚ lines


Advanced Techniques:

·         Rulers may be used in pairs for straightening and squaring.
·         Rulers may be paired in a parallel or perpendicular position.
·         Use multiple rulers to leapfrog across the fabric.
·         Consider ruler pairs instead of large acrylic squares to reduce the risk of acrylic slip.

Patched Works recommends the use of Invisigrip to reduce the slide of all brands of rulers.
Locally designed and manufactured in Wisconsin.


Straightening Cut

Fold fabric in half selvage sides together away from your body, folded edge towards your body.

Line up a straight edge of the Big Mama™ along the folded edge of your fabric with the raw edge exposed to the left.


Position a long strip cutter like the Rotary Rule™ or Big Daddy™ flush to the edge of the Big Mama™.


Move aside the Big Mama™, firmly hold Rotary Rule™ or Big Daddy™ and make a rotary cut using one continuous cutting motion.


**If the long ruler shifts, start over.**

Cutting Basics


**Hold the ruler firmly in the center. Fingers should be away from the edge.

**Stand directly in front of ruler.

**Rotary cutter should be perpendicular to the mat. Cutting with the blade at an angle will skew cut.

**Start off the edge of the fabric and firmly cut in a continuous motion.


Strip Cutting
Accurate cutting is your first step to accurate piecing!

After fabric is straightened, DO NO PICK FABRIC UP! Carefully fold the selvage edge in.

This allows a shorter cut.

You may need to restraighten your fabric every 4 cuts or whenever you move your fabric.


Cut accurate strips by aligning a 90˚ line of the ruler along the bottom fold and the measurement line along the left edge.


Note: Hand on ruler is not in place to illustrate the positioning of the ruler for a strip cut.

Restraighten fabric when fabric edge is no longer a 90˚ angle.


Practice makes perfect! We offer a "Let's Get Started" drop in class twice a month to help you beginners get started.

Have fun and happy quilting!
 

Monday, February 13, 2012

Wednesday Night Live


We are having so much fun at the store with our Wednesday lecture/demo format! From 3:00 p.m. to close we offer free mini demos on the main level. Demos typically last 15-20 minutes. Drop in at any time. We always have a technique handout or project sheet for you. Also enter to win a weekly door prize. Door prizes are fun little prizes that relate to the weekly demo.

Last summer we started Wednesday night demos to scare up a customer or two while Watertown Plank Road was reconstructed. Turning lemons into lemonade, you helped create Wednesday nights into a weekly event!

Patched Works is the quiltie place to have a girl's night out every week. Elm Grove eateries will make your evening more enjoyable. Make sure to bring in your show and tell to share.

We strive to teach you about the latest notions as well as build your skill set. There is always a little something for everyone. Check out the latest Wednesday night schedule here.

Here is just a snippet of some of the things we have done during our Wednesday night fun.


Leave us a comment to share what you topics you would like to see in Wednesday Night Live.

Tuesday, February 7, 2012

Welcome Back!

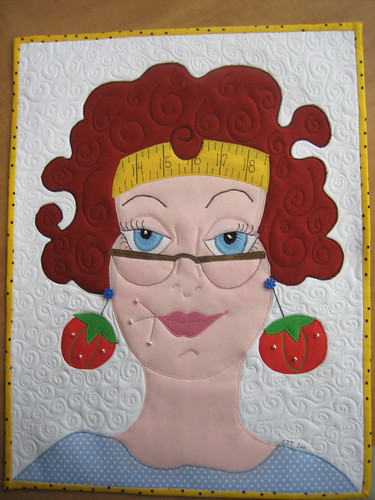
#16 in the Ladies Series "Julie"It’s the 37th day of 2012! I sent out the last of my holiday gifts today, finished my year-end bookkeeping last night and washed a load of laundry. I am now ready to begin my New Year’s Resolutions!
New Year’s Resolution #1 –Post a profile picture to my blog! J
So tonight, I did it! I grabbed a pic of the REAL “FabricJules”.

Last year, talented quilter, designer and blogger mamaCJT(Carol) immortalized me in fabric as number 16 in her series. Check out her blog to see all 20 girls in her 2011 Ladies Series. I keep the real “FabricJules” in the classroom at Patched Works. She makes me smile.
She has designed a line of contemporary quilt patterns we carry at the store. We are fortunate to showcase many of the samples.
Carol inspires me every time she visits the shop. I don’t think she ever sleeps. Whenever I need a little pick me up, I read her blog or browse her Flickr site. Last year she suggested we carry more solid fabrics. Done – we now carry the full 200+ color palette. How about a KONA club? We just kicked off the first quarterly meeting last week. Are we going to carry Malka Dubrawsky’s Stitch in Color? We weren’t – but we did… in less than a month the fabric is almost gone!

Thank you Carol for your constant inspiration!